
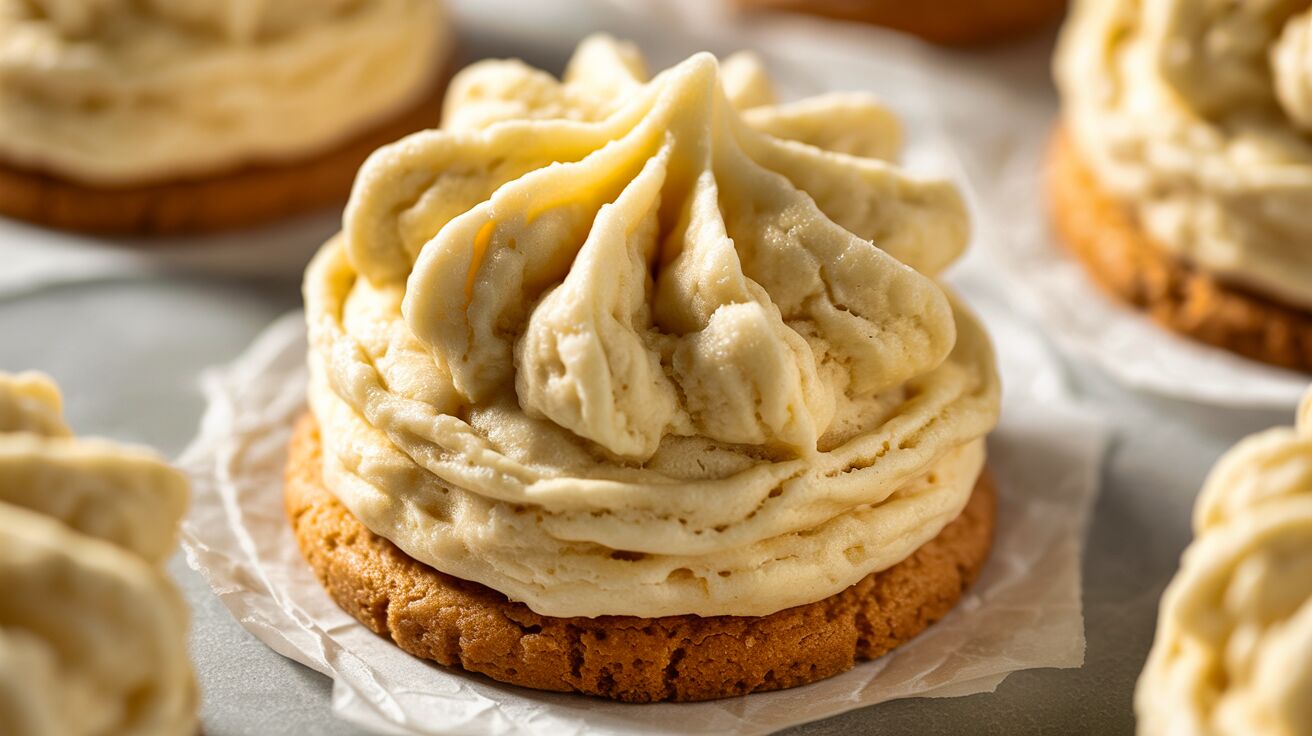
You’ll notice the difference the moment you bite into one: light, airy texture and pure butter flavor that dissolve on your tongue. Whipped shortbread cookies give you melt-in-your-mouth, buttery cookies with minimal fuss when you follow a few key techniques.
I’ll walk you through the core techniques, the exact ingredients that matter, and simple shaping and baking steps so you can make perfect whipped shortbread every time. Expect tips for decorating, storing, and easy variations that keep these classic shortbread cookies fresh and impressive.

Core Techniques for Perfect Whipped Shortbread
I focus on three precise actions that determine texture: how I whip butter and sugar, how I handle powdered sugar and measurements, and why butter temperature matters. Each step targets air incorporation, even mixing, and preventing grainy or greasy cookies.
Whipping Butter and Sugar for Lightness
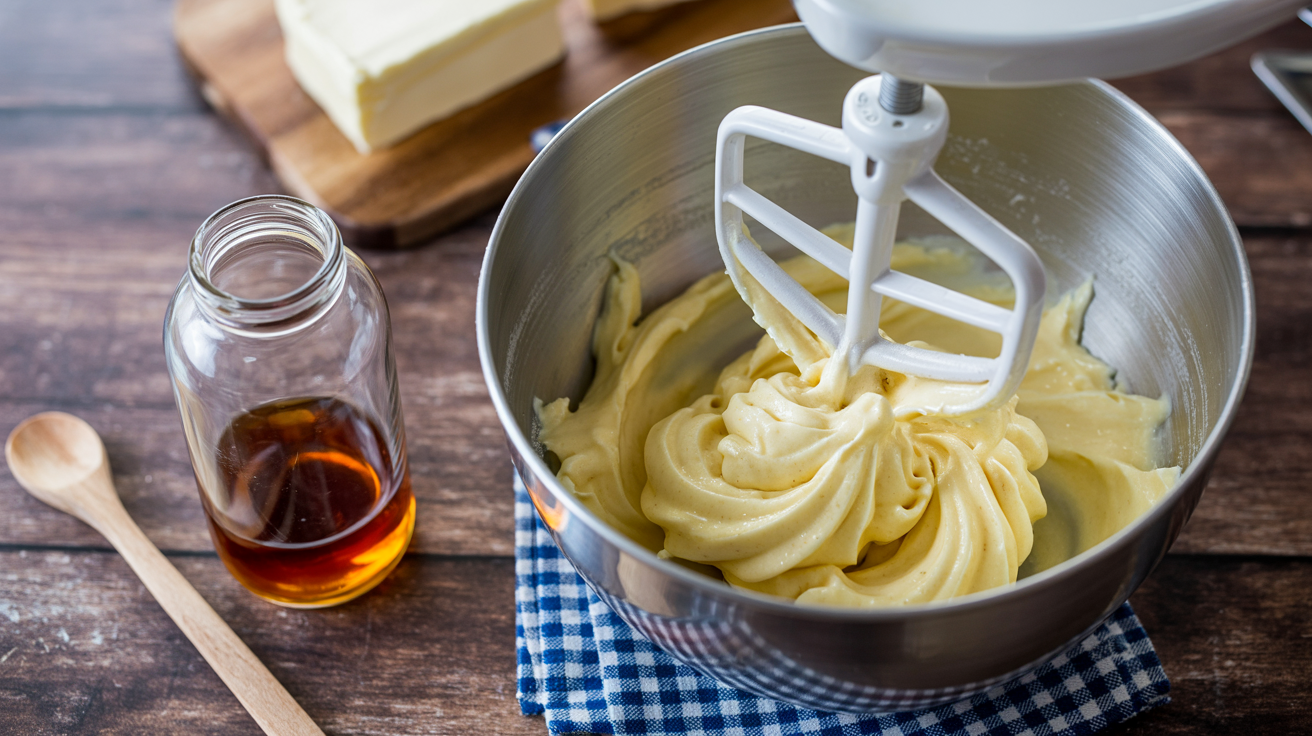
I whip the butter until it’s pale and airy before adding sifted powdered sugar. Start with butter at true room temperature — soft enough to dent with a fingertip but not greasy — and beat on medium-high for 3–5 minutes. You want volume and a ribbon-like texture; stop when the mixture is visibly lighter in color and holds soft peaks.
Add powdered sugar in two additions, scraping the bowl between them to keep air evenly distributed. Overbeating after dry ingredients are incorporated can collapse structure, so finish on low speed just to combine. This method gives buttery cookies a delicate, melt-in-your-mouth crumb.
Sifting Powdered Sugar and Measuring Ingredients
I always sift powdered sugar into the bowl rather than packing from the container. Sifting removes lumps and aerates the sugar so it blends smoothly with the butter without creating grit. If the recipe calls for cornstarch, I sift it with the sugar for consistent distribution.
I weigh flour and other dry ingredients when possible; 1 cup of all-purpose flour can vary by 20–30 grams if spooned versus scooped. For volume measures, I spoon flour into the cup and level with a straight edge. Accurate measuring prevents dense or crumbly cookies and helps produce the delicate cookies I aim for.
Why Room Temperature Butter Matters
Room temperature butter controls both texture and mixing behavior. If butter is too cold it won’t aerate and the dough stays dense; if it’s too warm it turns greasy and the cookies spread. I let a stick sit 30–60 minutes at cool room temperature, aiming for about 65–68°F (18–20°C) for optimal plasticity.
I test butter by pressing with a finger — it should yield but spring back slightly. That balance lets me whip maximum air into the fat while maintaining structure, producing light, flaky shortbread rather than flat, oily rounds.

Step by Step Insructions
Shortbread Whipped Is Something Different
Step 1: Prepare the oven and pan: Preheat the oven to 325°F (165°C). Line a baking sheet with parchment paper and set it aside so it is ready once the dough is mixed.

Step 2: Cream the butter and sugar: Place the softened unsalted butter and powdered sugar into the bowl of a stand mixer fitted with the paddle attachment. Beat on medium-high speed until the mixture becomes pale, fluffy, and creamy. This takes at least 5 minutes with a stand mixer and may take a bit longer with a hand mixer. Stop occasionally to scrape down the sides and bottom of the bowl so all the butter and sugar are evenly incorporated.
Step 3: Add flavoring: Add the vanilla extract and salt to the creamed butter mixture. Mix just until everything is evenly combined.

Step 4: Mix the dry ingredients: In a separate bowl, whisk together the all-purpose flour and cornstarch so they are evenly distributed.
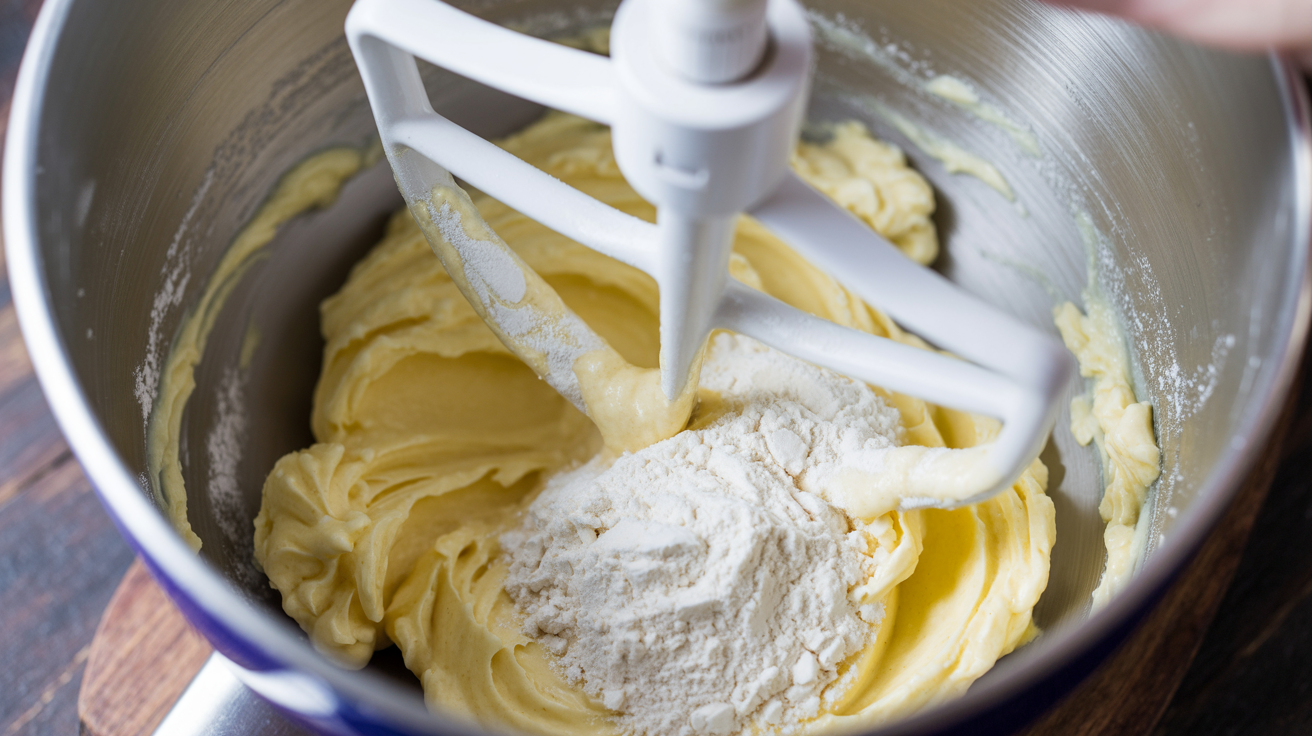
Step 5: Combine wet and dry ingredients: Reduce the mixer speed to medium-low and gradually add the flour mixture to the butter mixture. Mix only until the dough comes together and no dry flour remains. Avoid overmixing.

Step 6: Shape the cookies: Scoop the dough into tablespoon-sized portions. Roll each portion briefly between your palms to form smooth balls. Place them on the prepared baking sheet, spacing the cookies about 1 to 2 inches (2.5–5 cm) apart.

Step 7: Flatten and decorate: Use a fork to gently press each dough ball, flattening it slightly. If the fork sticks, dip the tines into a small amount of powdered sugar first. Sprinkle the tops with nonpareils, jimmies, or sugar, if desired.

Step 8: Bake the cookies in the preheated oven for about 12 minutes. The cookies should remain light in color when done. Allow them to cool completely on the baking sheet before removing, as they are delicate while warm.

Step 9: Remove cookies from oven and allow to cool before serving.
Choosing the Right Butter and Sugar
I use unsalted butter at room temperature (about 65–68°F/18–20°C) so it whips airy without becoming greasy. For 1 batch (about 2 dozen cookies) I typically start with 1 cup (226 g) butter; higher-fat European-style butters give a richer flavor but can change spread slightly.
For sugar I prefer powdered sugar because its fine texture integrates quickly and helps produce the signature tender crumb; replace up to 100% granulated with powdered if you want a softer melt. If I use granulated sugar, I beat longer to dissolve the crystals and prevent graininess.
When I cream butter and sugar, I stop once the mixture is pale and fluffy—usually 3–5 minutes with a stand mixer—so the dough captures air without overheating the butter. I add a pinch of salt to balance flavor and 1 tsp vanilla for lift and aroma.
Selecting and Balancing Flour and Cornstarch
I blend all-purpose flour with cornstarch to mimic cake flour’s tenderness. A common ratio I use is 2 cups (250 g) all-purpose flour plus 2–4 tbsp cornstarch; more cornstarch yields a more delicate shortbread. Measure flour by spooning into the cup and leveling or weigh it for accuracy.
Cornstarch reduces gluten formation and results in crumbly shortbread texture. I sift the dry ingredients together at least once to remove lumps and ensure even distribution before folding into the butter-sugar base.
If I need a sturdier cookie for piping or a cookie press, I slightly reduce cornstarch and keep a firmer dough; for melt-in-your-mouth results I increase cornstarch and handle the dough minimally.
Mixing and Handling Cookie Dough
I add dry ingredients in two additions and fold with a spatula or low-speed mixer to preserve air. Overmixing develops gluten and makes the dough tough; I stop as soon as streaks of flour disappear.
For piped or pressed cookies, I transfer dough warm enough to be pliable but not greasy; chilling for 15–30 minutes firms it for cleaner shapes. For cut or drop cookies, I chill 30–60 minutes to prevent excessive spread.
When shaping, I handle dough briefly and keep hands cool. I bake on parchment-lined sheets with 1-inch spacing and remove cookies when edges just set; carryover cooking finishes the centers for that classic shortbread crumb.
For more techniques and variations on texture and finishing, I often consult a tested recipe such as this whipped shortbread guide to compare ratios and tips.

Shaping, Baking, and Decorating
I focus on predictable shaping, low-temperature baking, and simple decorations that preserve the delicate, melt-in-your-mouth texture of whipped shortbread cookies. Exact portioning, careful chilling, and gentle finishing make the difference between fragile shortbread and perfectly tender butter cookies.
Forming Cookies for Even Baking
I portion dough using a 1-tablespoon scoop or a small cookie press to keep sizes uniform; consistent weight prevents underbaked centers and overbrowned edges. For round cookies, I roll balls, then flatten them slightly with the bottom of a glass or the tines of a fork for classical shortbread grooves. For piped whipped shortbread, I work with chilled dough and a large star tip; I pipe directly onto parchment for clean shapes.
I chill shaped dough 15–30 minutes on the baking sheet before baking when the dough feels soft. Chilling firms the butter so the cookies hold shape and bake evenly. If dough spreads too much, reduce oven temperature 10°F or add 1 tablespoon more flour to tighten the structure.
Baking Temperature and Texture Control
I bake whipped shortbread at a low temperature, typically 300–325°F (150–163°C), to set the cookie slowly and keep a pale, tender crumb. Look for edges that are just barely colored and bottoms that are set but not browned. High heat forms crust quickly and ruins the melt-in-your-mouth interior.
I rotate the pan halfway if my oven has hot spots and bake on the middle rack for even air circulation. Thin or small butter cookies often finish in 10–12 minutes; larger or piped shapes may need 12–18 minutes. I remove cookies when they look set and still soft in the center; they firm as they cool on the sheet.
Decorating with Toppings and Sprinkles
I keep decorations light to preserve the shortbread’s delicate texture. For sanding sugar or sprinkles, I press them gently into the dough before baking so they adhere without cracking the cookie after baking. For dipped or drizzled chocolate, I wait until cookies are completely cool to prevent bloom and sogginess.
I use powdered sugar dusting immediately before serving for a classic look. For more stable finishes, I temper or melt chocolate and dip half the cookie, letting excess drip off before cooling on parchment. If adding nuts or candied zest, I press them into the dough pre-bake to avoid heavy toppings that weigh down the melt-in-your-mouth crumb. If you’d like examples of shaping methods or visual inspiration, I recommend recipes that show piping and fork-pressed styles like this whipped shortbread guide (https://bakeorbreak.com/2025/12/whipped-shortbread-cookies/).

Serving, Storing, and Variations
I focus on practical steps that keep these delicate cookies fresh, present them attractively, and adapt flavors without breaking the dough’s texture. Readable storage times, simple flavor swaps, and gift-ready wrapping make whipping up a batch stress-free.
Storing Whipped Shortbread and Maintaining Freshness
I store cooled cookies in an airtight container at room temperature for up to 5 days to preserve the light, melt-in-your-mouth texture. I layer sheets of parchment between layers to prevent sticking and rubbing that can flatten the piped shapes.
For longer storage I freeze fully cooled cookies in a single layer on a baking sheet for 1–2 hours, then transfer to a freezer-safe container or resealable bag. Frozen whipped shortbread keeps well for 2–3 months; I thaw at room temperature for 30–60 minutes before serving so they regain tenderness.
Avoid refrigeration; the cold can make the butter firm and the cookies lose their delicate mouthfeel. If humidity is high, I include a small desiccant packet (food-safe) or keep the container in a cool, dry spot to prevent sogginess.
Adapting Flavors and Presentation
I start small when changing flavors: swap 1–2 teaspoons of extract (vanilla, almond, or lemon) or add 1 teaspoon finely grated citrus zest to the standard dough without altering fat-to-flour ratios. For a nutty note, I fold in 2–3 tablespoons finely ground toasted pecans or almonds, which preserves the crumb while adding depth.
For coatings and toppings I dust with sifted powdered sugar, press a chocolate-dipped end into tempered dark chocolate, or sandwich two cookies with 1–2 teaspoons of jam or ganache. I add color or festivity by piping slightly stiffer dough into shapes, then finishing with sprinkles immediately after baking so they adhere.
If I need vegan variation, I replace butter with a firm vegan butter at a 1:1 ratio and chill the dough slightly longer before piping to maintain shape. I test small batches when adapting to ensure the delicate texture stays intact.
Tips for Gifting and Storing
I package cookies in airtight tins or rigid boxes lined with parchment to protect fragile edges during transport. I separate layers with parchment and secure boxes with ribbon; include a small printed note that recommends storing at room temperature and consuming within five days for best texture.
When mailing, I cushion the container with bubble wrap and choose a sturdy outer box to prevent crushing. For longer gifting timelines I freeze cookies in the packaging and include thawing instructions: bring to room temperature for 30–60 minutes before presenting.
If recipients prefer variety, I assemble assortments—plain powdered, chocolate-dipped, and jam-filled—and label each variety so they know what to expect.
Whipped Shortbread vs Classic Shortbread
Whipped shortbread and classic shortbread share the same core ingredients, but their preparation creates very different textures. Whipped shortbread is made by beating butter and sugar together for an extended time, incorporating air into the dough. This results in a lighter, softer cookie that is delicate and melts quickly in the mouth. The texture is airy and less crumbly, making it feel more refined and less dense.
Classic shortbread, by contrast, is mixed more minimally, resulting in a firm, dense dough. Once baked, it has a crumbly texture and a rich, buttery flavor that is more substantial. It holds its shape well and has a traditional, slightly crisp bite. The key difference is texture: whipped shortbread is light and airy, while classic shortbread is dense and crumbly.
Choose whipped shortbread if you prefer a soft, melt-in-your-mouth cookie. Go with classic shortbread if you want a more traditional, firm texture with a rich buttery bite.

Scottish Whipped Shortbread Cookies Recipe FAQ
1. What makes whipped shortbread different from regular shortbread?
Whipped shortbread uses extra beating to incorporate air into the dough, creating a lighter, more delicate texture.
2. Why is the dough whipped instead of just mixed?
Whipping introduces air, which helps the cookies bake up softer and less dense.
3. How do you know when whipped shortbread is ready to bake?
The dough becomes pale and fluffy, indicating enough air has been incorporated.
4. Do whipped shortbread cookies spread while baking?
They hold their shape fairly well, especially if the dough is properly chilled.
5. What is the texture of whipped shortbread after baking?
They are very soft, tender, and almost melt in your mouth compared to traditional shortbread.

Whipped Shortbread Cookies
Ingredients
- 1 cup butter unsalted softened
- ¾ cup sugar powdered
- 1 tsp vanilla extract
- ¾ tsp salt
- 2 cups all-purpose flour
- 2 tbsp cornstarch
Instructions
- Prepare the oven and pan: Preheat the oven to 325°F (165°C). Line a baking sheet with parchment paper and set it aside so it is ready once the dough is mixed.

- Cream the butter and sugar: Place the softened unsalted butter and powdered sugar into the bowl of a stand mixer fitted with the paddle attachment. Beat on medium-high speed until the mixture becomes pale, fluffy, and creamy. This takes at least 5 minutes with a stand mixer and may take a bit longer with a hand mixer. Stop occasionally to scrape down the sides and bottom of the bowl so all the butter and sugar are evenly incorporated.

- Add flavoring: Add the vanilla extract and salt to the creamed butter mixture. Mix just until everything is evenly combined.

- Mix the dry ingredients: In a separate bowl, whisk together the all-purpose flour and cornstarch so they are evenly distributed.

- Combine wet and dry ingredients: Reduce the mixer speed to medium-low and gradually add the flour mixture to the butter mixture. Mix only until the dough comes together and no dry flour remains. Avoid overmixing.

- Shape the cookies: Scoop the dough into tablespoon-sized portions. Roll each portion briefly between your palms to form smooth balls. Place them on the prepared baking sheet, spacing the cookies about 1 to 2 inches (2.5–5 cm) apart.

- Flatten and decorate: Use a fork to gently press each dough ball, flattening it slightly. If the fork sticks, dip the tines into a small amount of powdered sugar first. Sprinkle the tops with nonpareils, jimmies, or sugar, if desired.

- Bake the cookies in the preheated oven for about 12 minutes. The cookies should remain light in color when done. Allow them to cool completely on the baking sheet before removing, as they are delicate while warm.

- Remove cookies from oven and allow to cool before serving.

Video

15 comments
Has anyone tried replacing butter with coconut oil for a healthier twist? Wonder how that would affect the melt-in-your-mouth factor.
Tried it once, ruined the texture. Stick to butter for the authentic melt-in-your-mouth feel.
Does room temperature butter really make a significant difference to the shortbreads texture? Is cold butter a no-go?
Absolutely! Room temperature butter ensures a smoother, richer texture. Cold butter? Forget about it!
Does room temperature butter really make a difference, or is it just a myth propagated by the butter industry?
Of course, it matters! Ever tried spreading cold butter on toast? Its a game changer, trust me.
Why do we stress room temperature butter? Could refrigerated butter possibly give a different, maybe interesting texture? Just a thought.
Ever tried spreading cold butter on bread? Same principle. Texture and blend matters.
Does anyone else think room temperature butter really makes a difference? Ive tried both ways and couldnt taste any difference!
Curious about the effect of using salted butter vs unsalted in our whipped shortbread. Anyone experimented with this?
Salted butter just enhances flavor, unsalted gives more control. I prefer the latter. Try experimenting yourself!
Does room temperature butter really make a difference? Ive always used cold butter and my cookies turn out fine.
Cold butter?! Youre missing out on the true beauty of creamy, fluffy cookies with room temperature butter!
Does room temp butter really make a difference? Wonder if theres a noticeable change in cookie texture if you skip sifting powdered sugar.
Interesting read! But does the room temperature butter really make that big a difference in the final shortbread texture?
Comments are closed.